If you’re in the machining or precision parts game, you know how much a tiny slip in grinding can mess up an entire project. That’s where profile, chamfer, and edge grinding tools come in—they’re the workhorses that make sure every corner, curve, and edge on a part is exactly where it needs to be. But here’s the thing: even the best tools won’t deliver consistent quality if you don’t know how to control every variable that impacts the grind. I’ve been in the game as a tool supplier for these exact grinding solutions for over a decade, and I’ve seen every mistake from over-grinding a chamfer so bad it scrapes a customer’s prototype to under-grinding a profile that gets rejected for being .002 mm off. Today, I’m breaking down how to nail control with these tools, no fancy tech jargon required—just real, actionable stuff I’ve picked up working side-by-side with shops big and small. Profile&Chamfer&Edge Grinding Tools
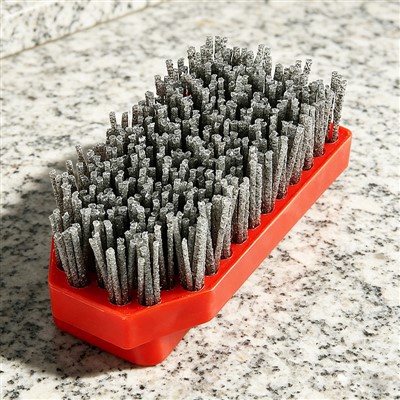
First off, let’s get on the same page: when we talk about profile, chamfer, and edge grinding tools, we’re not talking about the random bench grinder you use to sharpen a drill bit. These are specialized bits, wheels, and fixtures built for precision work—think aerospace turbine blades, medical implant edges, automotive transmission gears, even the tiny notches on a smartphone camera lens. Each of these parts has non-negotiable specs; a chamfer on a surgical tool can’t be too sharp (it’ll tear tissue) or too rounded (it’ll catch on packaging). A profile grind on a gear tooth can’t deviate at all or the transmission won’t shift right. So control here isn’t just “getting it right”—it’s repeating it, every single time, even when you’re running 1,000 parts a day.
Let’s start with the basics: tool selection. A lot of shops grab the first profile grinding wheel they see because it says “profile” on the box, but that’s a huge no-no. The material you’re grinding matters more than you think. If you’re working with hardened steel (like transmission gears), you need a grinding wheel with aluminum oxide abrasive—it’s tough, stands up to high heat, and won’t glaze over mid-job. For titanium or Inconel (super common in aerospace), cubic boron nitride (CBN) or diamond tools are non-negotiable. They cut faster, last way longer, and leave a smoother edge so you don’t have to do extra finishing. I had a customer last year who was using generic aluminum oxide wheels for their titanium valve stems; they were changing wheels every 200 parts and getting inconsistent edge quality. Switched to our CBN edge grinding tools, and they’re now getting 1,200 parts per wheel, plus their edge deviation dropped from .005 mm to .001 mm. That’s the kind of win that makes both me and the customer happy.
Don’t sleep on the tool geometry either. Profile tools have to match the exact contour you’re grinding—if you need a 30-degree chamfer on a 1 mm edge, your tool can’t be ground to 29 degrees. A lot of cheap tools come with a “close enough” profile, but that’s how you end up with parts that don’t fit the print. When you’re ordering from a supplier like me, ask for custom profiling if your part has a unique shape. We work with shops to grind the exact tool profile, chamfer angle, and edge radius they need, no one-size-fits-all garbage. Last quarter, a medical device shop came to us with a part that had a double chamfer—they’d been using a standard single chamfer tool and had to hand-grind half the parts, which killed their throughput. We made them a custom edge grinding tool with two angled edges, and now they run it fully automated, no hand-finishing needed. That’s control you can see.
Next up, setup and fixturing. Even if you have the perfect tool, if your part isn’t held tight and straight, the grind will be off. I’ve seen a shop spend $10k on top-of-the-line profile grinding tools, then skimp on a $50 vise and end up with parts that wobble. For edge and chamfer work, fixturing has to be rigid and accurate enough to hold the part within .001 mm—any movement, even a tiny twitch, will throw off the chamfer angle or profile contour. Take the time to align your fixture before every run. Use a dial indicator to check that the part is parallel to the grinding wheel, and that the chamfer angle matches the tool’s angle. Don’t rush this step—spending 10 minutes aligning will save you hours of reworking bad parts. Also, pay attention to how you load parts into the fixture. If you’re manually loading, make sure you’re placing them in the exact same spot every time. Even a 0.5 mm shift can turn a perfect chamfer into one that’s too short or too long. We usually tell our customers to use quick-change fixturing for high-volume runs—something that lets them load and unload parts in seconds without realignment. It’s a small investment, but it cuts setup time by 70% and makes consistency way easier.
Then there’s grinding parameters—speed, feed rate, depth of cut. This is where a lot of new grinders mess up. Every material and tool combo has a sweet spot, and deviating from it will ruin quality. Let’s break it down: wheel speed. If you run your profile grinding wheel too slow, it will drag across the part, creating friction, heat, and a rough edge. Run it too fast, and the abrasive grains will chip off too fast, leading to uneven grinding and shorter tool life. For aluminum oxide wheels grinding hardened steel, I usually recommend a surface speed of 2,500 to 3,000 SFPM. For CBN on titanium, it’s higher—around 4,000 to 5,000 SFPM. Feed rate is another big one. The feed rate is how fast the table moves the part past the wheel. If you feed too fast, you’re asking the wheel to remove too much material at once, which can cause chatter—those weird wavy lines you see on a ground edge. Feed too slow, and you over-grind, wasting material and adding time. For chamfer grinding, I like a feed rate of 0.1 to 0.2 mm per pass for most materials. For profile work, it depends on the contour—tight curves need a slower feed rate than straight edges. Depth of cut is the last parameter. Never take a big depth in one pass. Even if your tool can handle it, you’ll get heat buildup that can cause the part to warp or the edge to crack. Instead, take multiple shallow passes. For example, if you need to remove 0.5 mm of material to get your profile right, do 5 passes of 0.1 mm each. It’s slower, but the quality is way more consistent, and your tools last longer too. I always tell customers to test parameters on scrap parts before running production. That way, if the feed rate is too fast or speed is too low, you don’t waste good parts.
Coolant and wheel condition—two things that get overlooked all the time. Coolant isn’t just for keeping the part cool; it flushes away the grinding chips, prevents wheel glazing (when abrasive particles get clogged with metal), and reduces friction. If you’re running dry, you’ll get built-up edge on the wheel, which makes the grind rough and inconsistent. Make sure your coolant is the right type—water-based for most grinding work, synthetic for materials that react with water. Also, check the concentration level every few days. Too weak, and it won’t lubricate enough; too strong, and it can leave residue on the part that’s hard to clean. Wheel condition is equally important. As you grind, the abrasive grains wear down, and the wheel gets dull. You need to dress the wheel regularly to expose new sharp grains and keep the profile accurate. Most grinders only dress the wheel when it’s clearly dull, but that’s too late. Dress it before every production run, and even halfway through long runs, to maintain consistency. For profile tools, use a diamond dresser shaped to match your profile—don’t just use a generic diamond. If you mess up the dresser profile, you’ll grind the wheel wrong, leading to bad parts. I had a customer once who skipped dressing their profile grinding tool for three days; by the end, their parts had a 0.008 mm deviation on the profile, which meant they had to scrap 500 parts. Dressing takes 5 minutes, but it saves you way more time and money.
Inspection is the final piece of the puzzle. Even if you follow all the steps, you need to check parts as you go to catch issues early. What’s the best way to inspect profile, chamfer, and edge quality? Use a combination of tools: a micrometer or caliper for dimensions, a chamfer gage to check the angle, and a profile projector or CMM for more complex contours. For edge quality, use a magnifier or a scanner to check for burrs, cracks, or roughness. Don’t wait until the end of a run to check—inspect the first part, then every 50 or 100 parts, and adjust your parameters if you see a drift. I recommend keeping a log of parameters, part numbers, tool IDs, and inspection results. That way, if you get a bad batch, you can go back and see what changed—was the wheel speed off? Did you forget to dress the wheel? It makes troubleshooting so much easier. Last year, a customer was getting random bad chamfers on their parts, and they couldn’t figure out why. When we looked at their log, they saw that they’d increased the feed rate by 0.05 mm per pass a week prior, and they’d skipped dressing the wheel three times. We fixed those two things, and the bad parts stopped. No fancy tech, just paying attention.
At the end of the day, controlling grinding quality with profile, chamfer, and edge grinding tools isn’t rocket science—it’s about paying attention to every small detail. From picking the right tool material and geometry to setting up your fixturing correctly, tuning your parameters, maintaining your tools, and inspecting parts along the way, each step builds on the last to deliver consistent, high-quality results. I’ve spent years working with shops on these exact issues, and the ones that nail quality aren’t the ones with the fanciest equipment—they’re the ones that follow these basics, take the time to do things right, and don’t cut corners.
If you’re struggling with inconsistent grind quality right now, whether it’s chamfers that are off-angle, profiles that deviate, or edges that are too rough, we can help. We work with all kinds of machining operations, from small job shops to large aerospace and medical facilities, to get their profile, chamfer, and edge grinding tools working for them, not against them. We’ll walk through your specific part requirements, help you pick the right tools, and even share hands-on tips to make your process more consistent. Don’t waste more time scrapping bad parts or dealing with customer rejections—reach out to us to chat through your grinding needs today.
Metal Frankfurt Abrasive References:
- Stephenson, D. A., & Agapiou, J. S. (2018). Metal Cutting Theory and Practice (3rd ed.). CRC Press.
- Tönshoff, H. K., Denkena, B., & Brinksmeier, E. (2002). Precision Grinding of Advanced Materials. CIRP Annals – Manufacturing Technology, 51(2), 631–652.
- Shaw, M. C. (2005). Principles of Abrasive Processing. Oxford University Press.
- American Society for Metrology (2019). Precision Measurement of Machined Edges and Contours. ASME B89.70.1-2019.
Quanzhou Cheefung New Materials Co., Ltd.
Address: Jinshan Community, Licheng District, Quanzhou City, Fujian, China
E-mail: info@prostonetools.com
WebSite: https://www.prostonetools.com/
